Examples
3. Monitor and Control
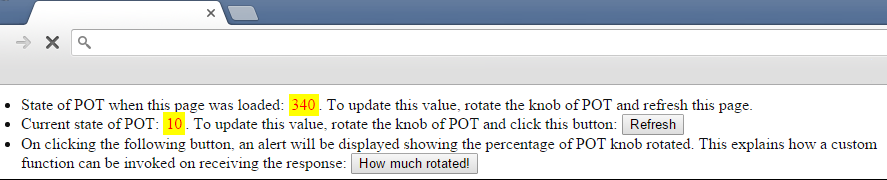
In this example, you will learn to build a powerful and fully interactive human-machine interface in the form of a web-application. This example illustrates how to control the state of LED based on value received from POT. Note that, the threshold value and the decesion to glow (on/off) LED is controlled through webpage and NOT from Arduino.
Hardware
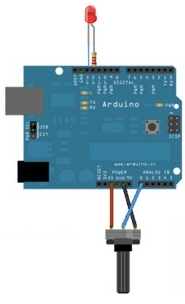
- Get an Arduino board, POT, LED, resistor and few jumpers
- Connect a POT at analog pin# A0
- Connect a LED at digital pin# 13. Don't forget to add a resistor in series with LED
- Connect Arduino board with computer
Sketch
- Open Arduino IDE
- Install swDuino Arduino library (if not yet installed)
- Open example: Files > Examples > swDuino-Lib > write_read sketch
- Upload it to Arduino board
swDuino
- Open swDuino
- Configure Serial/COM and HTTP/Web server (optional)
- Start swDuino Server
Web browser
- Open web browser
- Browse this page: http://[server]:[port]/files/examples/monitorandcontrol.html (click here if you have used the default configuration for HTTP/Web server)
- Go to Output to experience results